
Project Overview
In this circuit, you'll use the RedBoard and a small buzzer to make music, and you'll learn how to program your own songs using lists.
Project 2 - Circuit A

New Components
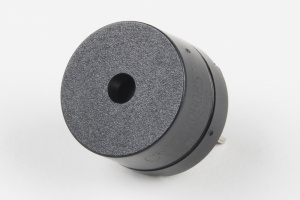
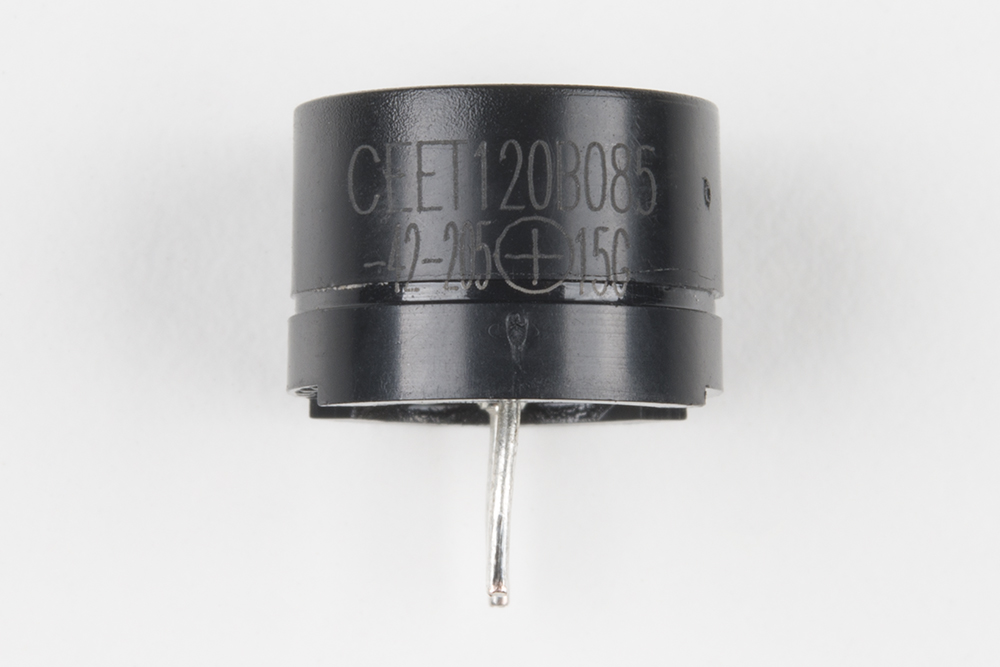
Buzzer
The buzzer uses a small magnetic coil to vibrate a metal disc inside a plastic housing. By pulsing electricity through the coil at different rates, different frequencies (pitches) of sound can be produced. Attaching a potentiometer to the output allows you to limit the amount of current moving through the buzzer and lower its volume.
New Concepts
Reset Button
The RedBoard has a built-in reset button. This button will completely reset the board and can be used to get a fresh start if anything odd is occurring. If you have “saved” any code to your board (which you will learn about in circuits 4C and 5C) it will be run when you reset. Note: You will need to reconnect to your board in Jupyter after resetting.

Playing Sound with PWM
To control the buzzer, we will use the same PWM functionality that we used to control the RGB LEDs. By passing different frequencies and durations to our PWM we can play different tones for different lengths of time from our buzzer.
Lists
Lists are used like variables, but they can store multiple values. Imagine that you want to store the frequency for each note of the C major scale. We could make seven variables and assign a frequency to each one, or we could use an list and store all seven in the same list, as shown below. To refer to a specific value in the list, an index number is used. lists are indexed from 0. For example, to call the first element in the list, use list_name[0] to call the second element, use list_name[1] and so on.
| Musical Note | Frequency (Hz) | Using Variables | Using a List |
|---|---|---|---|
| A | 220 | aFrequency | frequency[0] |
| B | 247 | bFrequency | frequency[1] |
| C | 261 | cFrequency | frequency[2] |
| D | 294 | dFrequency | frequency[3] |
| E | 330 | eFrequency | frequency[4] |
| F | 349 | fFrequency | frequency[5] |
| G | 392 | gFrequency | frequency[6] |
len() function
To get the length of a list (and many other types of objects in python) you can call len() on it. For example, to get the length of a list called myList we could use: len(myList) and the length would be returned. This is helpful when searching through all of the elements of a list.
Hookup Guide
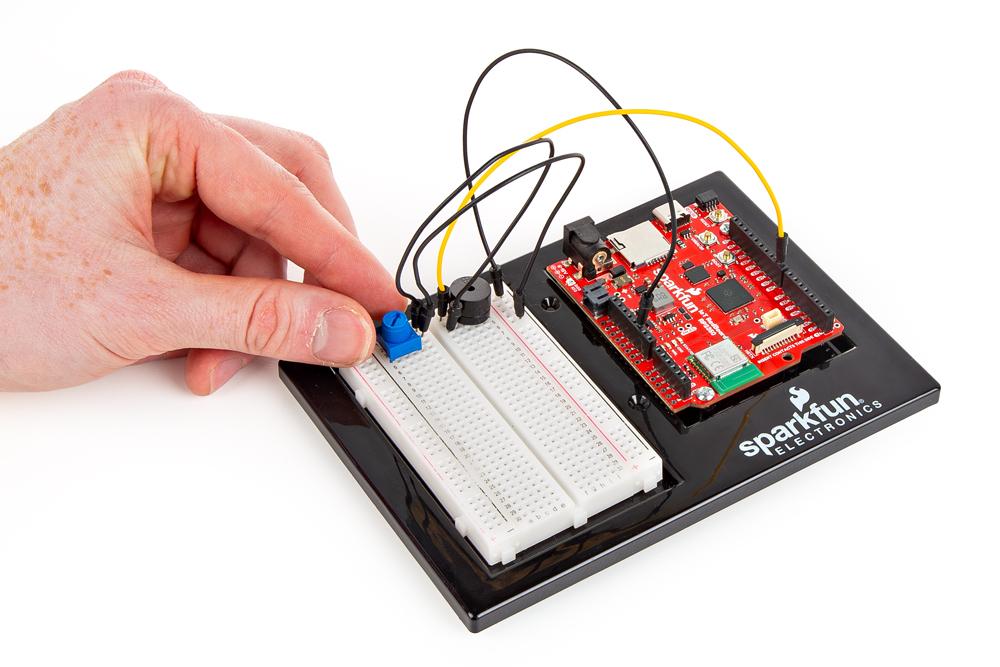
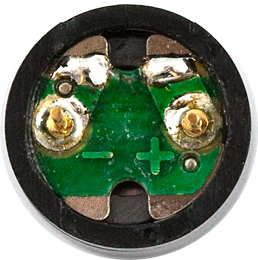
⚠️ Warning For Polarized Components: Pay special attention to the component’s markings indicating how to place it on the breadboard. Polarized components can only be connected to a circuit in one direction.
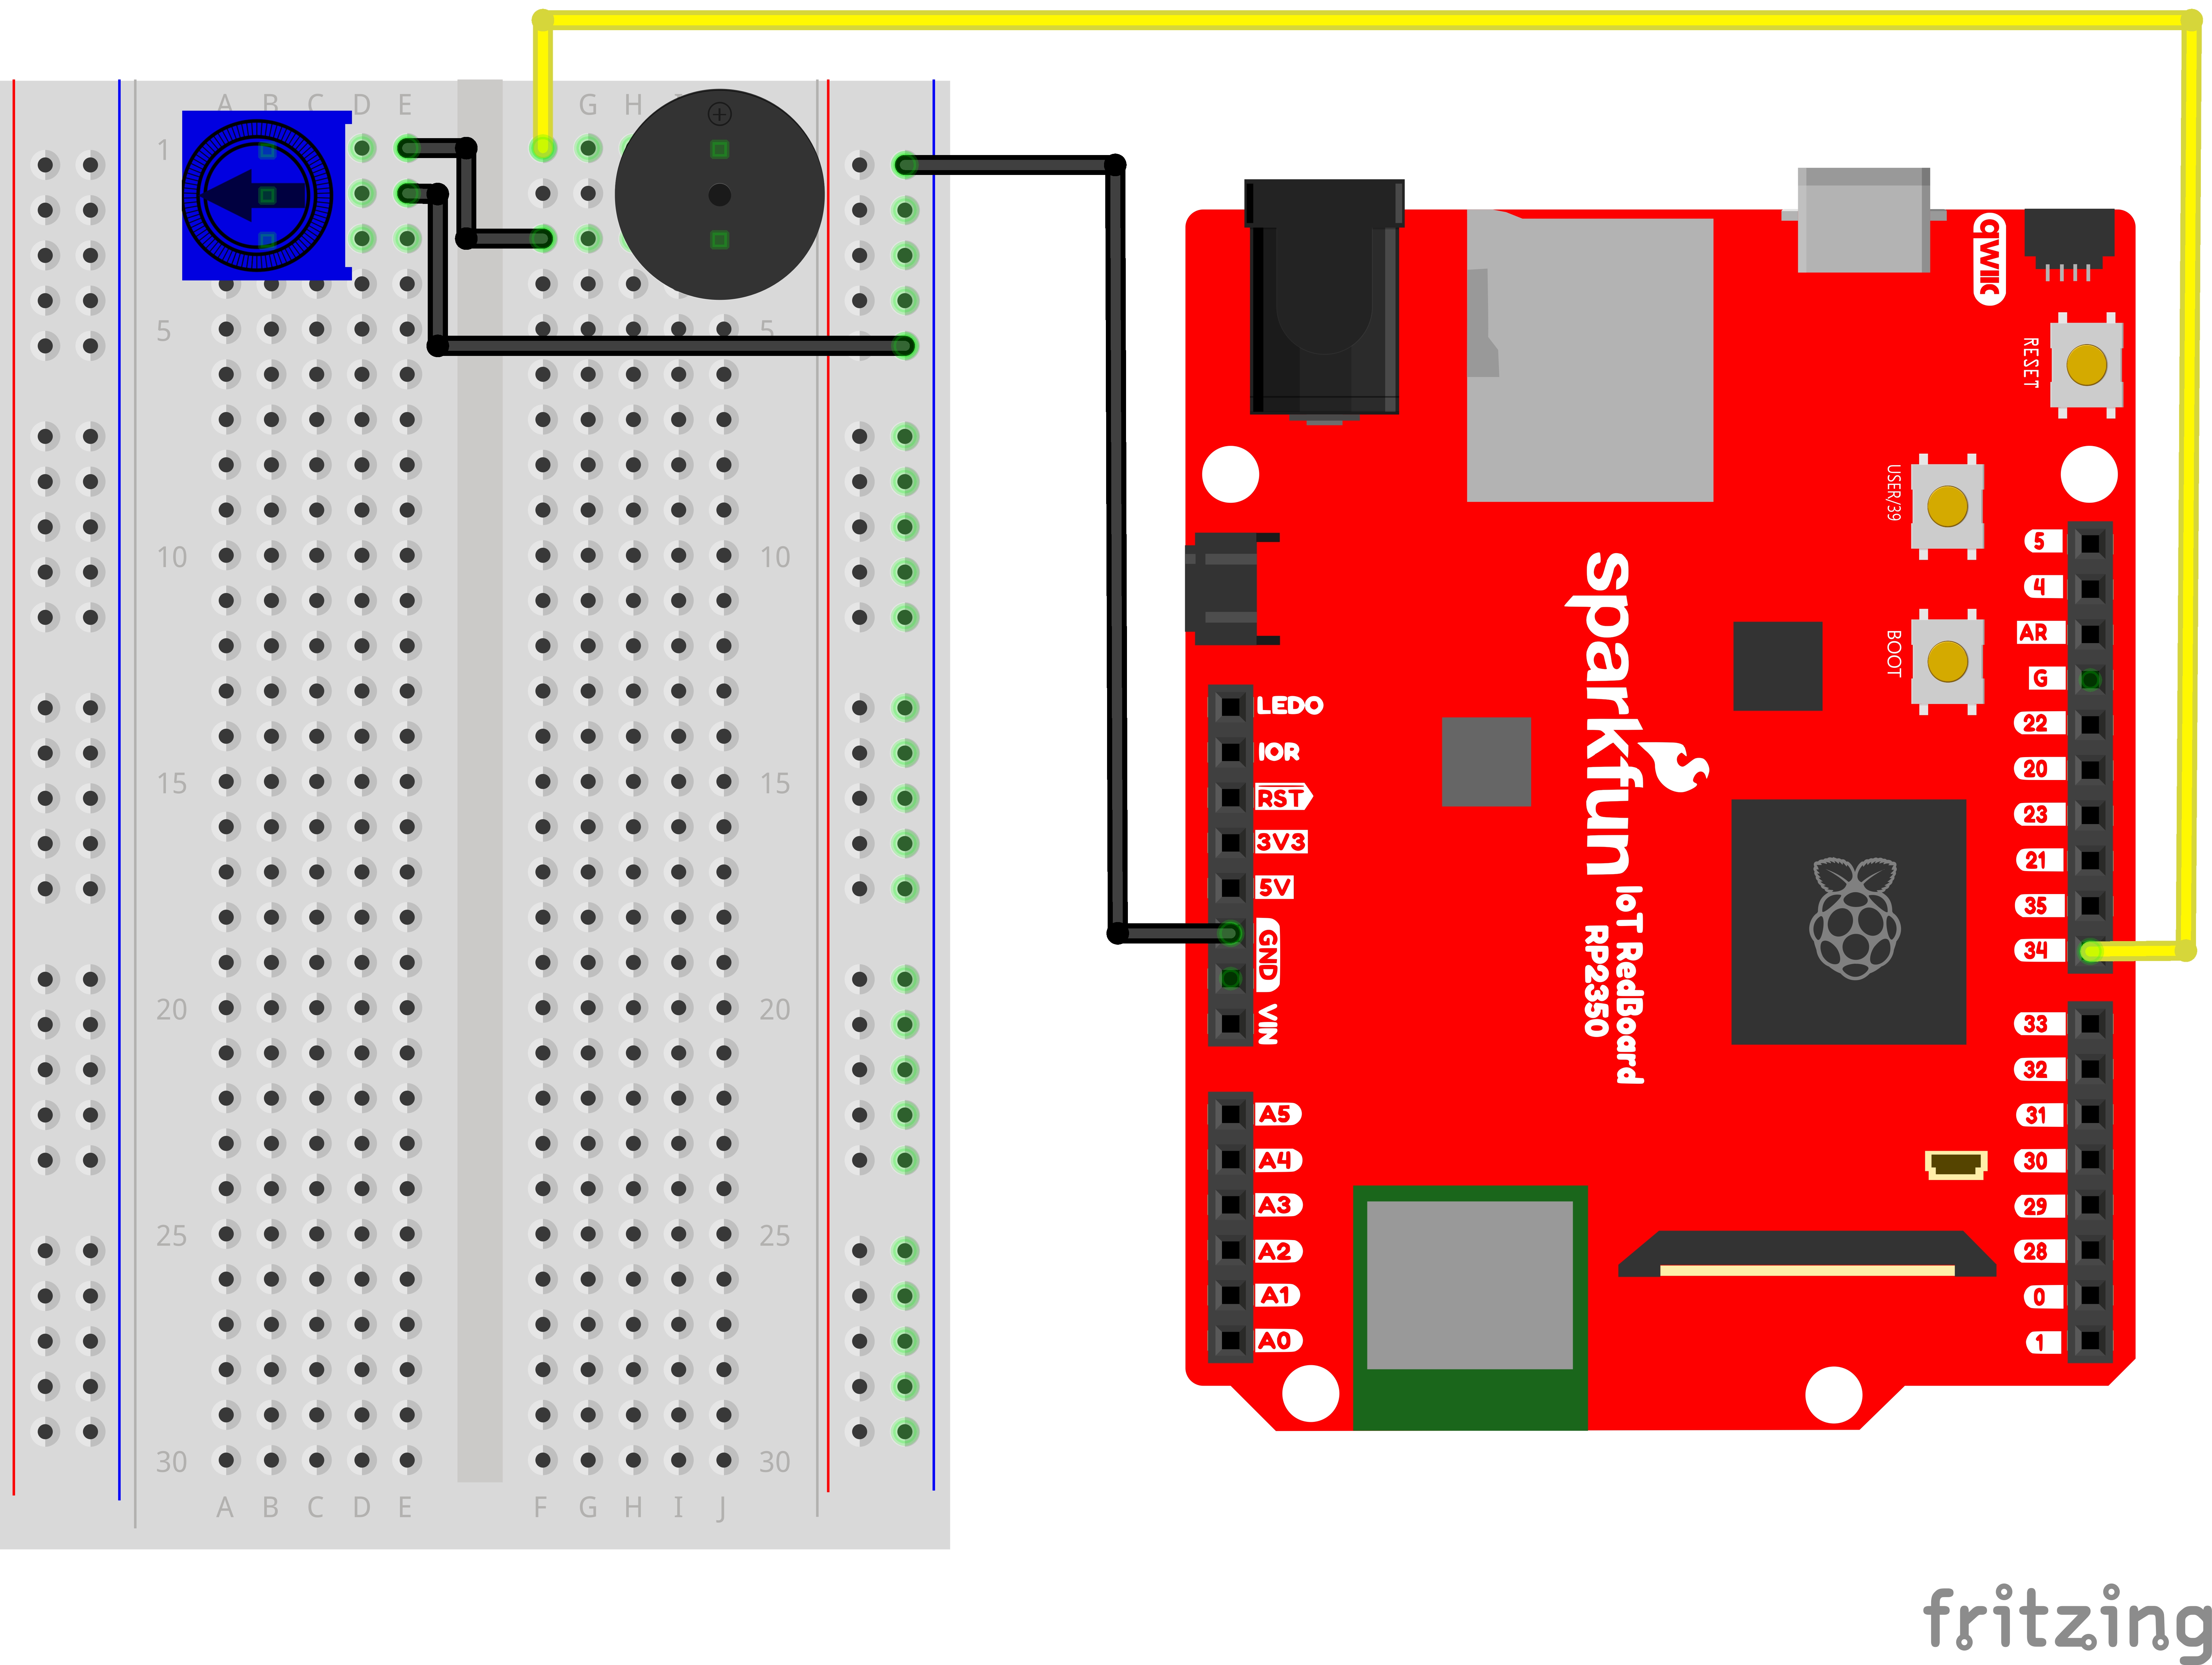
The buzzer is polarized. To see which leg is positive and which is negative, flip the buzzer over and look at the markings underneath. Keep track of which pin is where, as they will be hard to see once inserted into the breadboard. There is also text on the positive side of the buzzer, along with a tiny (+) symbol.
Volume Knob
All of the circuits in Project 2 make use of a potentiometer as a rudimentary volume knob. Notice that only two of the potentiometer’s legs are used in these circuits. In these instances, the potentiometer is acting as a variable resistor, limiting the amount of current flowing to the speaker and thus affecting the volume as you turn the knob. This is similar to the current-limiting resistor used to limit current to the LED in circuit 1A — only this time the resistance is variable.
READY TO START HOOKING EVERYTHING UP? Check out the circuit diagram and hookup table below to see how everything is connected.
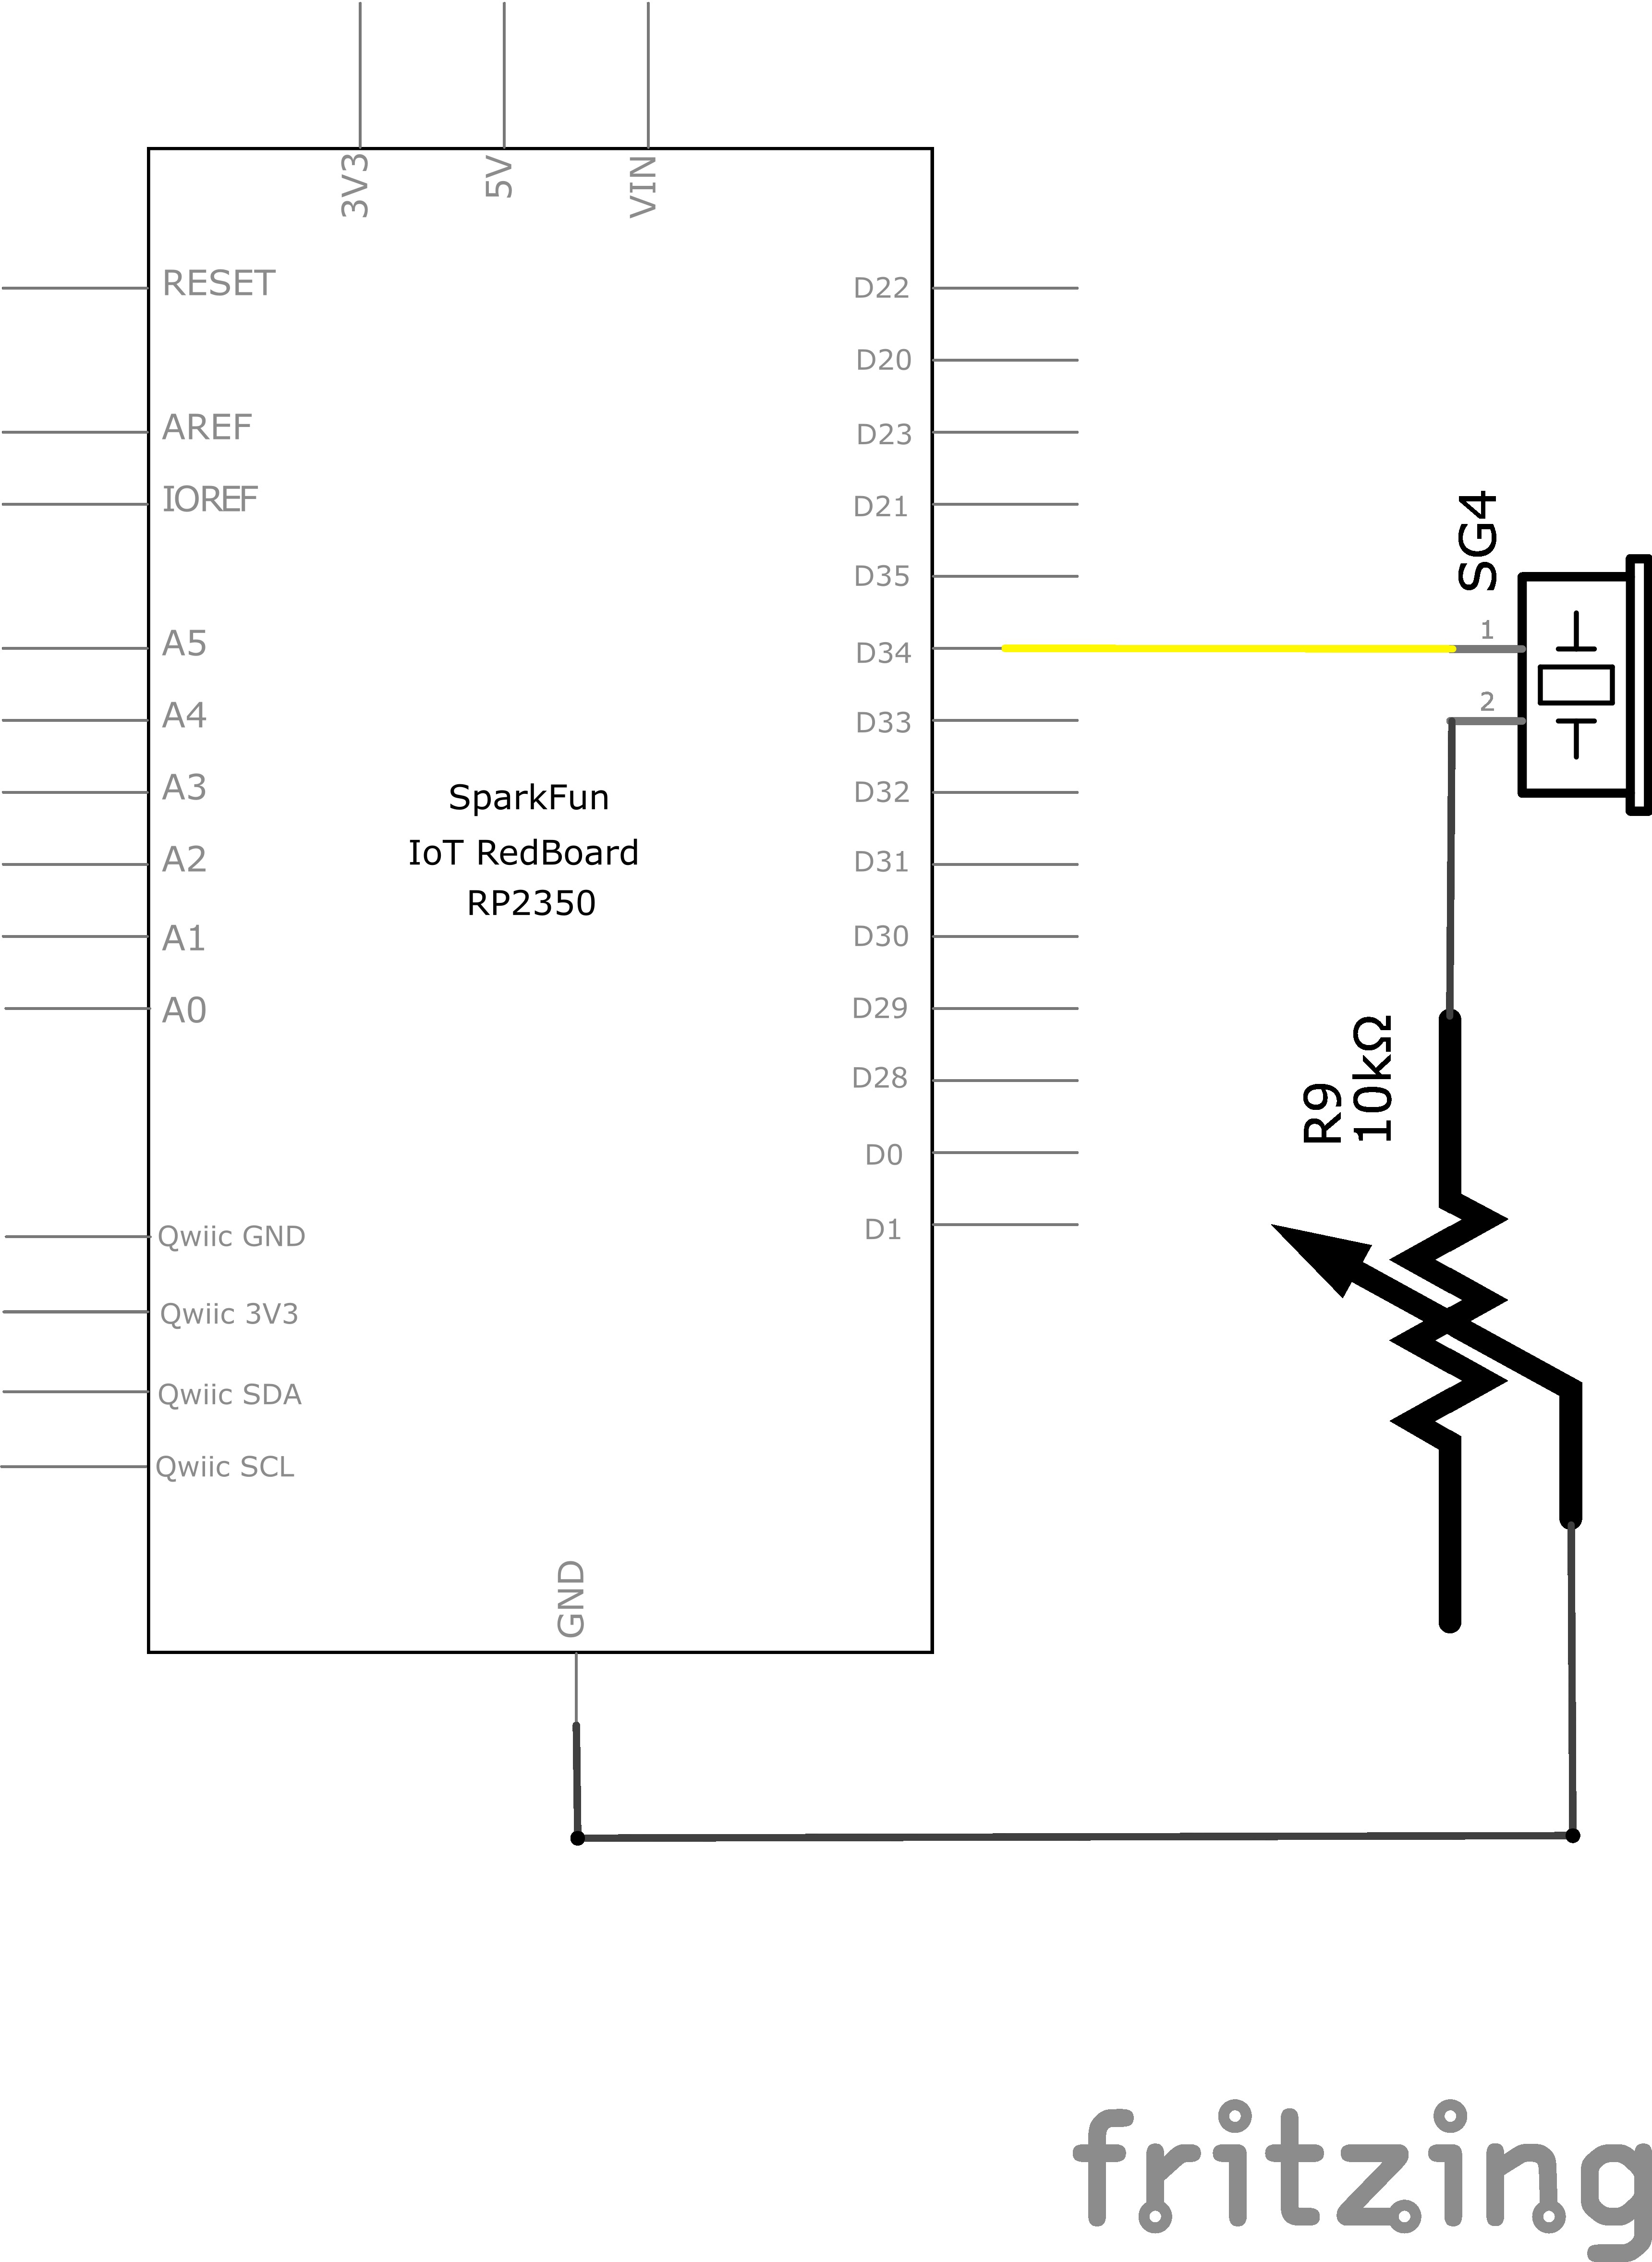
Circuit Diagram
Note for Advanced Users: If you know how to read datasheets and schematics, you can also refer to the schematic below as an alternative.
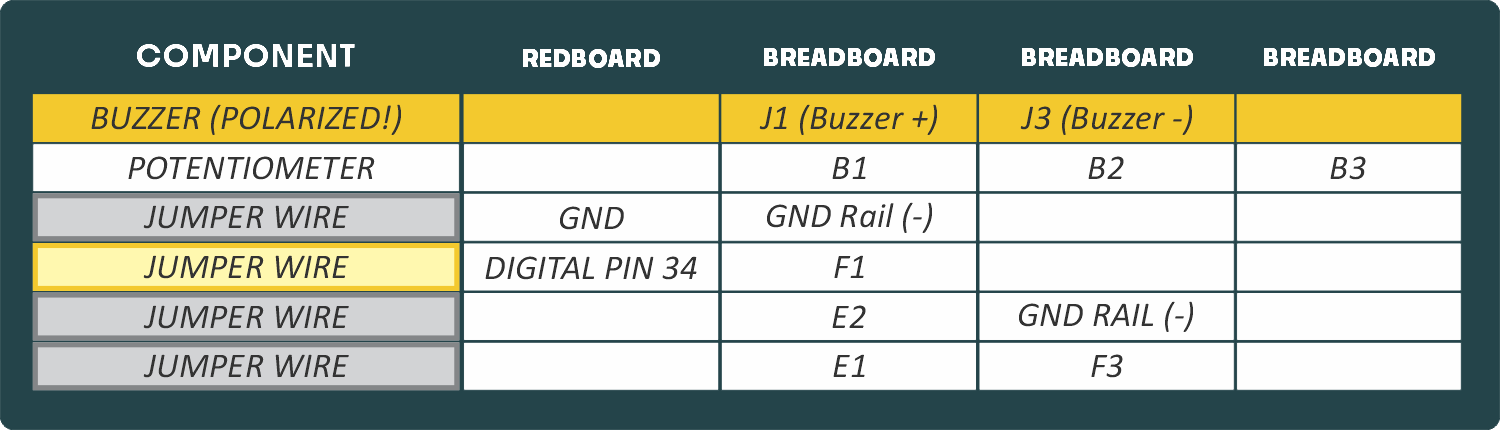
Hookup Table
Programming the RedBoard
The SparkFun RedBoard IoT is programmed using MicroPython and this project uses MicroPython commands to control the circuit. Before this is possible, a MicroPython tool is needed to communicate with the RedBoard.
Selecting a MicroPython Tool
Our suggested tool is the Thonny IDE. For instructions on how to install and use Thonny, check out our Thonny Guide.
The first step to enter commands on the RedBoard is to select a tool that allows direct interaction with MicroPython.
While a variety of methods exist to communicate with the RedBoard, the following tools are the most popular: Thonny, PyCharm and the command mpremote.
Once you select and install a tool, make sure your RedBoard is connected to your computer, and the micropython tool is connected to the RedBoard. Once connected, you should have access to the MicroPython REPL command line.
Remember that the source files for each SIK circuit are already on your IoT RedBoard RP2350 in the “sik_examples” folder. So if using the suggested Thonny tool, you can select the example for this circuit and run it directly with the green “run current script” button rather than executing lines individually.
Entering MicroPython Commands
Step 1 - Setup
Lets start by importing any of the libaries we plan on using and setting up our pins.
from machine import Pin # Allows us to use "Pin" to use code to interface with the pins on our board
from machine import PWM # Allows us to use "PWM" (pulse-width modulation) to control the brightness of our LED

pwmSpeaker  = PWM(Pin(34), freq=0, duty_u16=0) # Create a PWM object on pin 34 with a frequency of 0Hz and an initial "on time" of 0 (off)
Step 2 - Creating a Function to Play Notes
Next, let’s create a function to play notes. Let’s convert the table below into lists. Let’s also allow the function to take in a character representing a note to play and a number of beats to play it. Then we can look up that note in our lists and play the corresponding frequency.
Advanced Tip: Python actually has a “fancier” data structure called a dictionary that makes this kind of lookup much easier.
| Note | Frequency (Hz) |
|---|---|
| c | 131 |
| d | 147 |
| e | 165 |
| f | 175 |
| g | 196 |
| a | 220 |
| b | 247 |
| C | 262 |
| D | 294 |
| E | 330 |
| F | 349 |
| G | 392 |
| A | 440 |
| B | 494 |
from time import sleep # Import the sleep function to pause execution for a specified duration
beatLength = 0.25 # Define the length of a beat in seconds (0.5 seconds). Change this to adjust the tempo of the music.
restLength = 0.05 # Define the length of a rest in seconds (0.25 seconds). Change this to adjust the length of pauses in the music.

def play(note, beats):
    # To define a list we put it in square brackets []
    # These list is used to look up the frequency of each note
    notes = ['c', 'd', 'e', 'f', 'g', 'a', 'b', 'C', 'D', 'E', 'F', 'G', 'A', 'B', ' ']
    # This list contains the frequencies corresponding to the notes in the "notes" list
    # For example the 4th item in the "notes" list is 'f' and the 4th item in the "frequencies" list is 175Hz, its frequency
    frequencies = [131, 147, 165, 175, 196, 220, 247, 262, 294, 330, 349, 392, 440, 494, 0]

    # We will now search our lists for a match
    frequency = 0

    # This loop will step through each note in the "notes" list and look for a match with the "note" variable
    # Notice the len(notes) function returns the number of items in the "notes" list
    # The range function creates a sequence of numbers from 0 to len(notes) - 1
    # The "for" loop will repeat for each number in that sequence
    for i in range(len(notes)):
        if notes[i] == note:  # If the note matches the current note in the list
            frequency = frequencies[i]  # Get the corresponding frequency

    pwmSpeaker.freq(frequency)   # Set the frequency of the PWM signal to the specified frequency
    if frequency == 0: # If the frequency is 0, it means we are playing a rest (no sound)
        pwmSpeaker.duty_u16(0)  # Set the duty cycle to 0 (off)
    else:  # If the frequency is not 0, we are playing a note
        pwmSpeaker.duty_u16(32768)   # Set the duty cycle to 50% on time (half as loud as possible)
    sleep(beats * beatLength)    # Wait for the specified number of beats (0.5 seconds per beat)
    pwmSpeaker.duty_u16(0)       # Turn off the speaker by setting duty cycle to 0
    sleep(beats * restLength)  # Wait for the specified number of rests (0.25 seconds per rest)
Step 3 - Playing a song
Finally, let’s use our function that can play notes to play a whole song by calling it multiple times with different notes. Even if it’s not your birthday, I’m sure you’ll recognize this tune!
# Happy Birthday melody using the play() function
play('g', 2)    # ha
play('g', 1)    # ppy
play('a', 4)    # birth
play('g', 4)    # day
play('C', 4)    # to
play('b', 4)    # you

play(' ', 2)    # pause for 2 beats

play('g', 2)    # ha
play('g', 1)    # ppy
play('a', 4)    # birth
play('g', 4)    # day
play('D', 4)    # to
play('C', 4)    # you

play(' ', 2)    # pause for 2 beats

play('g', 2)    # ha
play('g', 1)    # ppy
play('G', 4)    # birth
play('E', 4)    # day
play('C', 4)    # dear
play('b', 4)    # your
play('a', 6)    # name

play(' ', 2)    # pause for 2 beats

play('F', 2)    # ha
play('F', 1)    # ppy
play('E', 4)    # birth
play('C', 4)    # day
play('D', 4)    # to
play('C', 6)    # you
What You Should See
When the program begins, a song will play from the buzzer once. Use the potentiometer to adjust the volume.
Coding Challenges
| Challenge | Description |
|---|---|
| Change the tempo of the song | Experiment with the beatLength variable to change the tempo of the song. |
| Make your own song | Try changing the notes to make a different song. Spaces " " can be used for rests in the song. |
Troubleshooting
| Problem | Solution |
|---|---|
| The song is too quiet or too loud | Turn the potentiometer to adjust the volume. |
| No sound is playing | Try pressing the reset button on the RedBoard. If that doesn’t work, check your wiring of the buzzer. It's easy to misalign a pin with a jumper wire. |
You’ve Completed Circuit 2A!
Continue to circuit 2B to learn about buttons.